- Professional Construction Software Solutions
- 480-705-4241
Default Markup Layer in Bluebeam Revu

Bluebeam Tip: How to Erase From All Pages
May 4, 2017BluePrints Podcast is Live!
June 14, 2017I’ve seen layers used for many things in Bluebeam Revu: Revision notes by user, take-off by discipline, punch by discipline, etc. Often the markups are placed then you assign them to layers after the fact. I blogged about this previously in Estimating and Layers. There’s another way to assign the layer that’s quick and easy before you start.
Setting a default markup layer
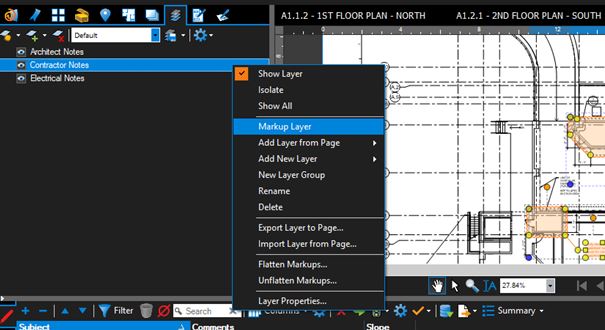
Open the Layers Tab (either thru Tab Access or using the shortcut ALT+Y) and hover over the layer you want your markups to be applied to.
Right Click on the Layer of your choice and choose Markup Layer
You will get a dialogue box prompt confirming the layer you just assigned.
You can click OK or if you don’t want to see this prompt again, check the box before clicking OK. 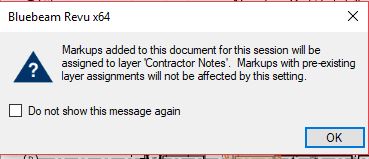
The markups icon appears to the right of the default markup layer.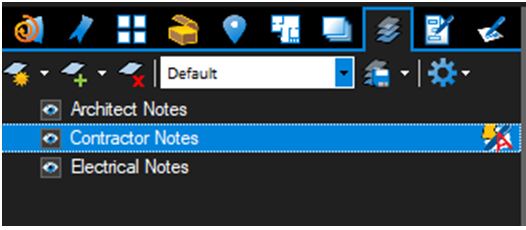
The markups you add will appear on this layer of the document. You can change the markups layer by repeating the above process. Note that if you are going to use Studio Sessions and collaborate on this PDF, you may want to remove the default markup layer before uploading it.
Please share this Bluebeam Revu tip with your team and improve their productivity. If you like this article and want to receive new tips via email automatically, I invite you to subscribe to our blog here.
